# Jira DC (Data Center)
You can use this extension guide to install and configure the Squadcast extension in JIRA Data Center in order to automatically create issues in JIRA projects from Squadcast and vice versa. The status of the issues on JIRA and incidents in Squadcast will automatically be in sync.
{% hint style="danger" %}
**Important:**
Jira DC extension will not be supported in the EU data center.
{% endhint %}
## Prerequisites
1. A valid Squadcast cloud subscription or a trial account (in the Pro, Premium or Enterprise [plans](https://squadcast.com/pricing))
2. You should have JIRA DC version installed on your machine with a publicly accessible URL
3. A user account in JIRA DC with `Administrator` privileges
4. Base URL must be set in JIRA settings and it must be publicly accessible as mentioned above
5. Only the Account Owner and Users with the `Manage Extensions` permission will be able to enable, disable and manage Extensions in Squadcast
6. Install the Squadcast Plugin from the [Atlassian App Store](https://marketplace.atlassian.com/apps/1233175?tab=overview\&hosting=datacenter)
## Configuring the Extension
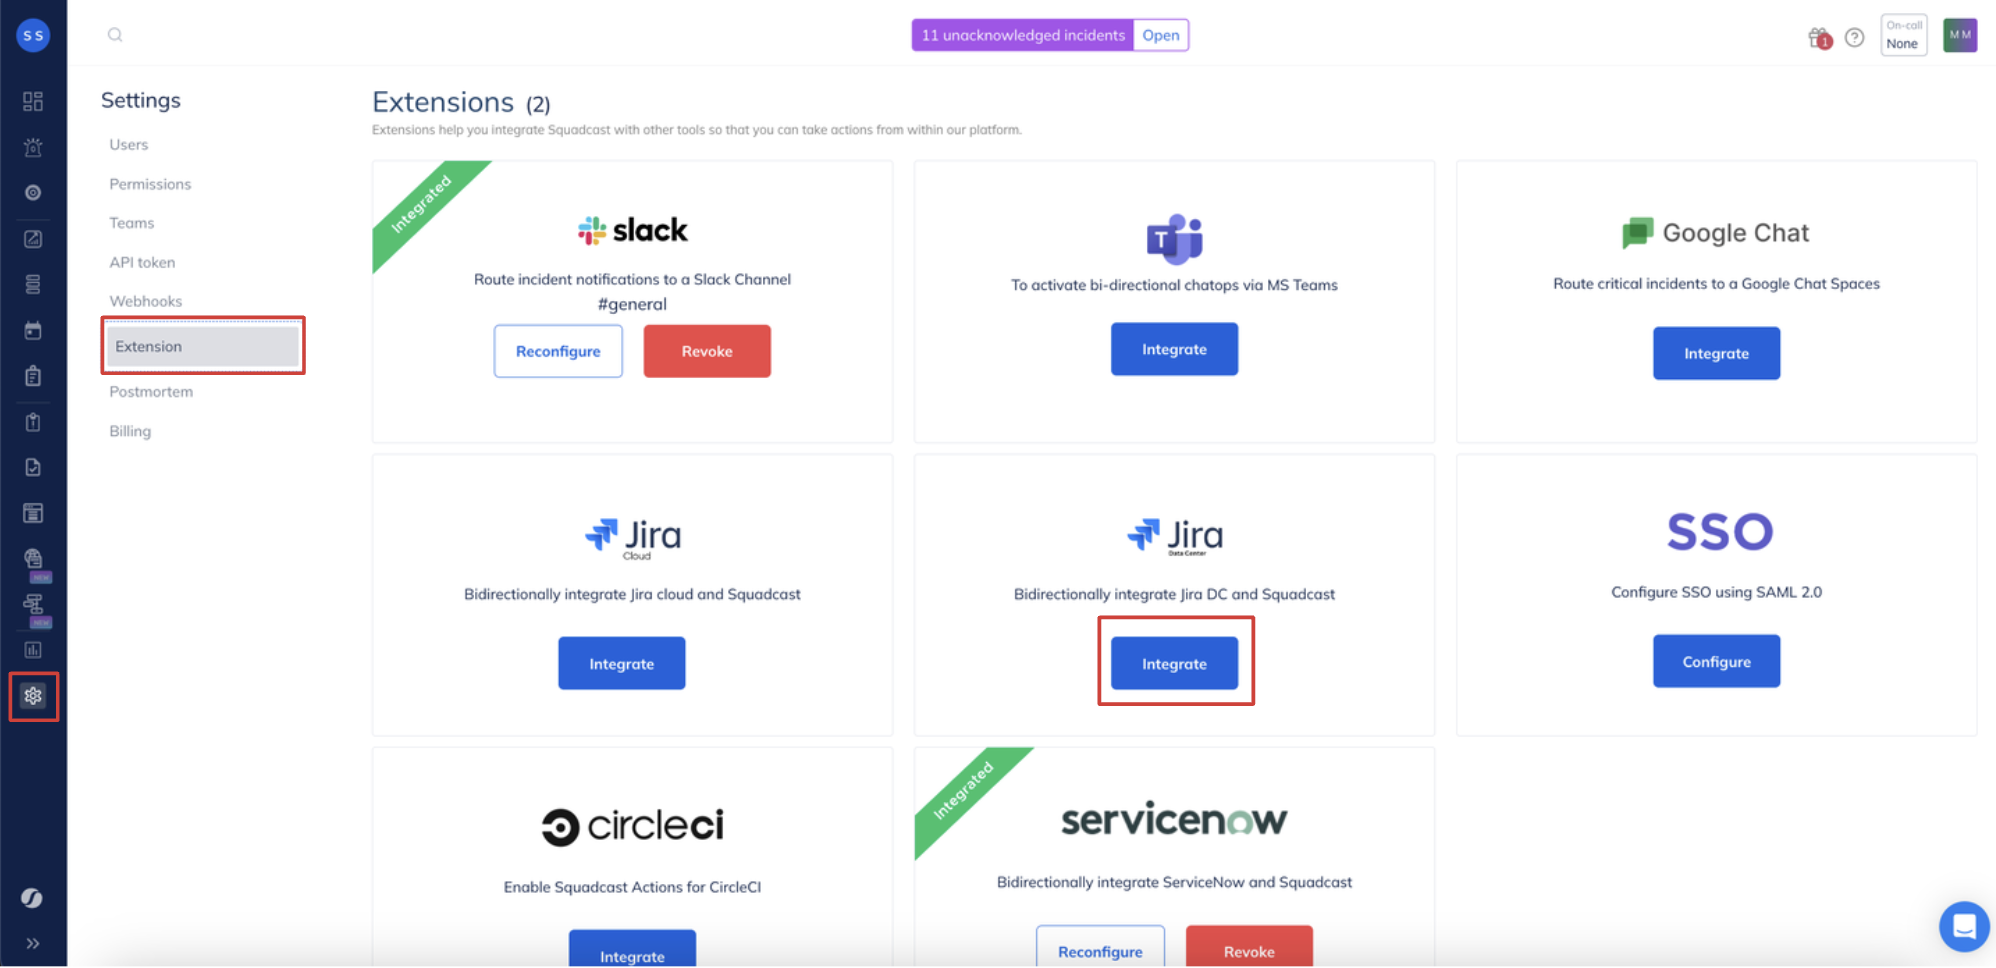
1. In Squadcast, navigate to **Settings** and select the **Extensions** tab from the left navigation sidebar. Move over to the JIRA Cloud extension and click on **Integrate**
2. Now click on **Configure** to receive a **token**
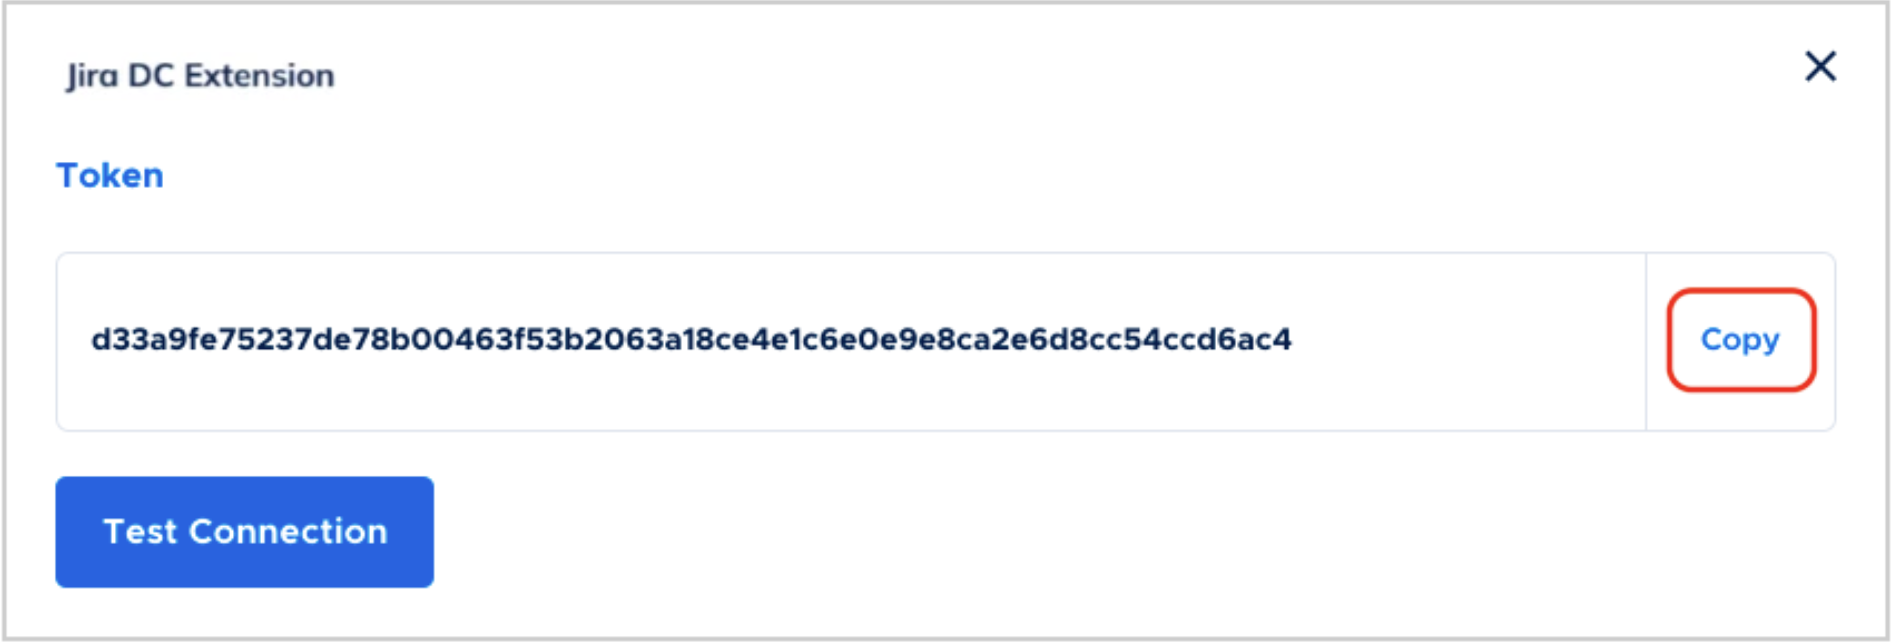
3. Copy the displayed **token**
4. Go to the **Manage Apps** page on your JIRA DC Account from the **Settings** drop-down
5. Select the Squadcast Plugin from the **User-installed apps** and Click **Configure**
6. In the configuration page, paste the Squadcast token in the **JIRA Integration Key** text box. Then click **Integrate**

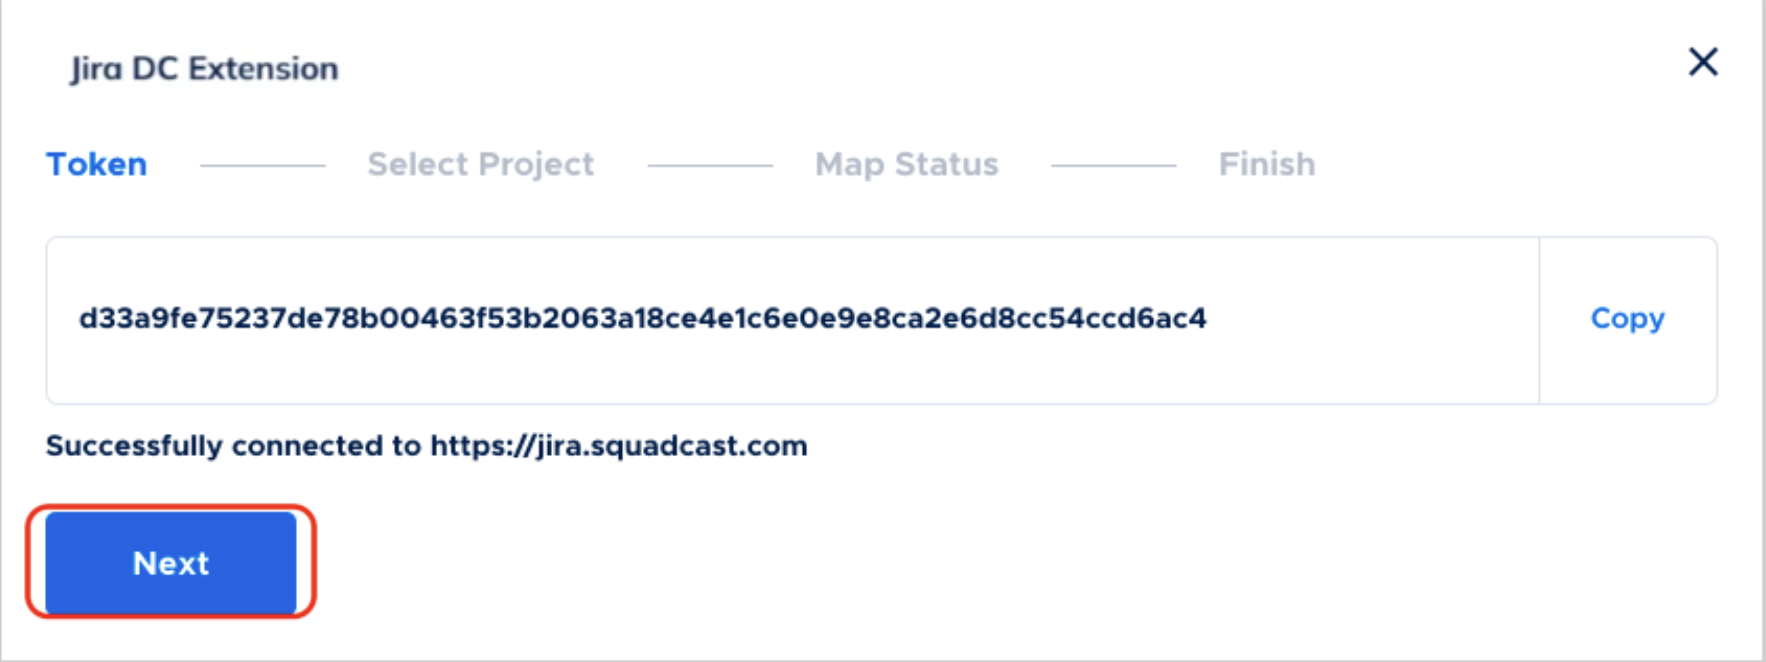
7. Move over to Squadcast and click on **Test Connection**. You will then receive a success message right below the text box. Post this, click on **Next**
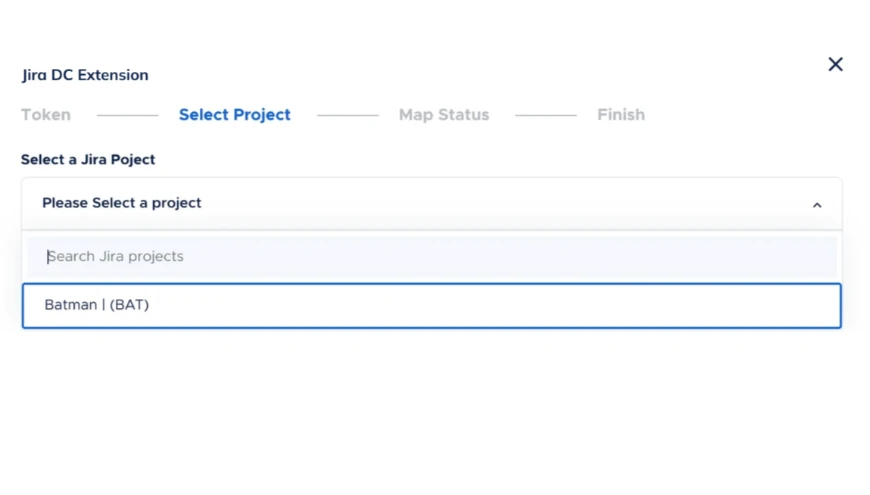
8. Select the Jira project in which the issue needs to be created and select the issue type and click **Next**
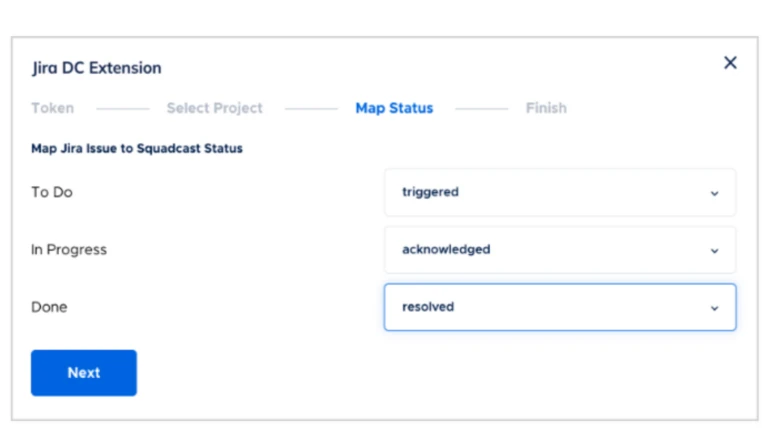
9. Then map the Jira issue status to the available Squadcast statuses and click **Next**
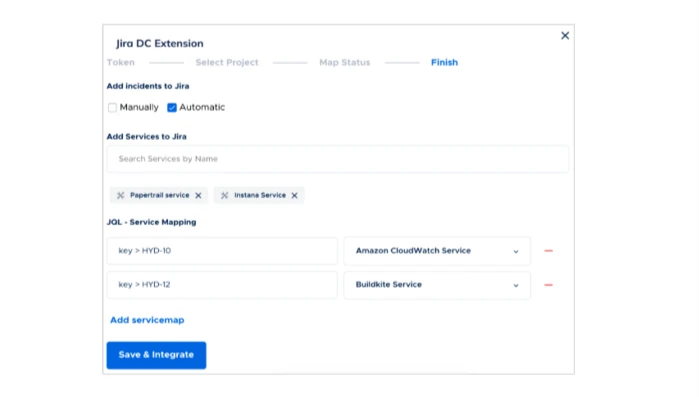
10. Then select the mode in which you want to add an incident to Jira: **Manually** or **Automatically**
Now, there are 2 sections:
* Add Services to Jira
* JQL - Service Mapping
**Add Services to Jira:** If an incident is created for any service selected in this section, a corresponding Jira ticket would be created in the configured *project* having the configured *issue type*.
**JQL - Service Mapping:** If a ticket is created in Jira, then the mappings defined in this section would be iterated **one by one** and an incident would be created for the service corresponding to the first JQL that is evaluated to be true for that Jira ticket. If none of the JQL matched, then no incident would be created in Squadcast.
{% hint style="info" %}
**Note:**
The issue must be in the same Jira project and be the same Jira Issue type. If you are using the Jira Service Desk, incidents are created from JQL before [automation rules](https://confluence.atlassian.com/servicedeskserver041/automating-your-service-desk-969530933.html) are applied.
Make sure that the **issue priority** is enabled for issues in Jira in order to create incidents in Squadcast.
{% endhint %}
So, to summarize:
**Add Services to Jira:** Handles Jira ticket creation corresponding to incident creation in Squadcast.
**JQL - Service Mapping:** Handles Squadcast incident creation corresponding to ticket creation in Jira.
That’s it! Your JIRA DC Integration is good to go.
The statuses of the Squadcast Incident and JIRA Issue will be automatically synced as per the mapping configured.
{% hint style="info" %}
**Note:**
Incidents in Squadcast created for issues in Jira using the Jira plugin will not have a status sync.
{% endhint %}
{% hint style="info" %}
**Note:**
If the Squadcast incident reaches either **Resolved** or **Suppressed** status, the bidirectional status syncing will stop even if the issue is re-opened in JIRA, as these both are end states in Squadcast.
{% endhint %}
{% hint style="info" %}
**Note:**
The default directory for user creation should be **Jira Internal Directory**. If the **squadcast user** gets created in any other directory apart from **Jira Internal Directory**, you will have to move the user to the **Jira Internal Directory** by following the steps below:
**1.** Delete the **squadcast user** that was created post the integration.\
**2.** Then, add a new user. The username should be **squadcast** and the password should be the **token** that is available in [step 2 here](https://support.squadcast.com/integrations/extensions/jira-dc).\
**3.** Kindly ensure that you have selected **Jira Internal Directory** from the dropdown while creating the user.
{% endhint %}
## Usage of the Automatic and Manual Modes
### Automatic mode
If you have chosen the Automatic mode while configuring Jira DC then you need not do anything. Any incident triggered for the selected service will automatically create an issue in the selected Jira project with the configured issue type.
### Manual mode
If the chosen mode is Manual, follow the below steps to create an issue in Jira.
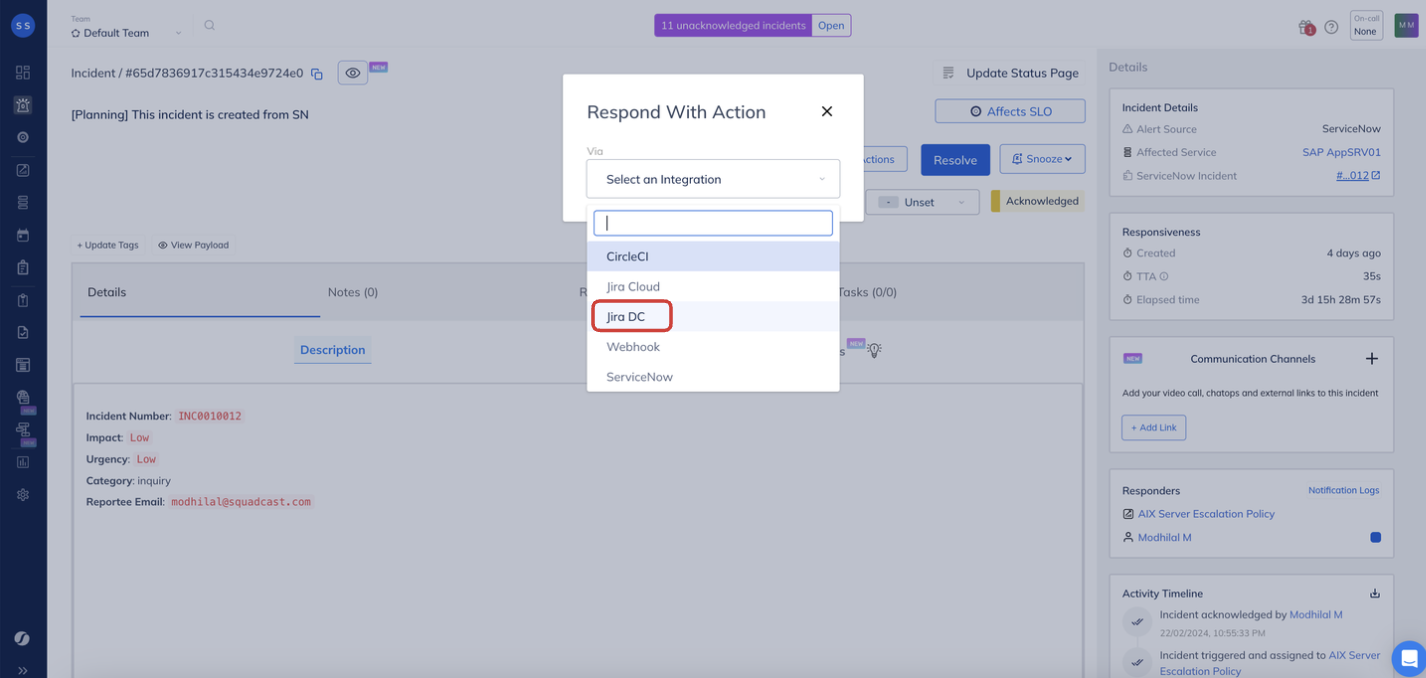
1. Open the incident in Squadcast and click on the **More Actions** button
2. Select **Jira DC** action and click on the **Create a new ticket in Jira** button
An issue will be created in the selected Jira project with the configured issue type and this action will be recorded in the incident timeline with a hyperlink to the created Jira issue.
Similarly, if there was an error in creating a ticket in Jira, it will be reflected in the Incident Timeline.
{% hint style="success" %}
**Note**
Ensure to check the permissions associated with Squadcast user. To do this, go to System > Admin Helper > Permission Helper. Choose Squadcast in the User drop-down and validate if permissions - Browse Project, Create Issue, Transition Issue, Resolve Issue exist. If not, then add these permissions to the user group that Squadcast user is a part of. This information can be checked under System > User Management.
{% endhint %}
### Using Tags to Configure Jira Project and Issue Priority
{% hint style="danger" %}
**Note**
Currently to use multiple Jira projects your status mappings need to be the same for all your Jira projects. We will be using the status mapping you configured in the \`Map Status\` section of the configuration.
{% endhint %}
You can use [Tagging Rules](https://support.squadcast.com/services/event-tagging) to map your issue priority and project by following the steps below :
**(1)** Create a tagging rule that helps you set the priority and configure the Jira project for an incident in Squadcast by using the tags:
* `priority`- `Jira Priority`
* `issuetype` - `Issue Type Name`
* `project`- `Project Key`
Now the Jira ticket will be created based on the tag values
{% hint style="info" %}
**Tags are Case Sensitive**
The values of all the tags are case-sensitive. Use the same case which has been used in Jira.
{% endhint %}
#### Example of configuring the Tags using Tagging Rules

{% hint style="info" %}
**Note**
Setting `project` and `issuetype` for your configured service will override your mapped project and issuetype configuration for that particular service.
\
Also, make sure to use both `project` and `issuetype` tags for creating your issue in a project different from the mapped one.
{% endhint %}
*Have any questions?* [*Ask the community*](https://community.squadcast.com/view/home)*.*
---
# Agent Instructions: Querying This Documentation
If you need additional information that is not directly available in this page, you can query the documentation dynamically by asking a question.
Perform an HTTP GET request on the current page URL with the `ask` query parameter:
```
GET https://support.squadcast.com/integrations/extensions/jira-dc.md?ask=
```
The question should be specific, self-contained, and written in natural language.
The response will contain a direct answer to the question and relevant excerpts and sources from the documentation.
Use this mechanism when the answer is not explicitly present in the current page, you need clarification or additional context, or you want to retrieve related documentation sections.