# Honeybadger
Follow the steps below to configure a service so as to push related alert data from Honeybadger onto Squadcast.
Squadcast will then process this information to create incidents for this service as per your preferences.
### Using Honeybadger as an Alert Source
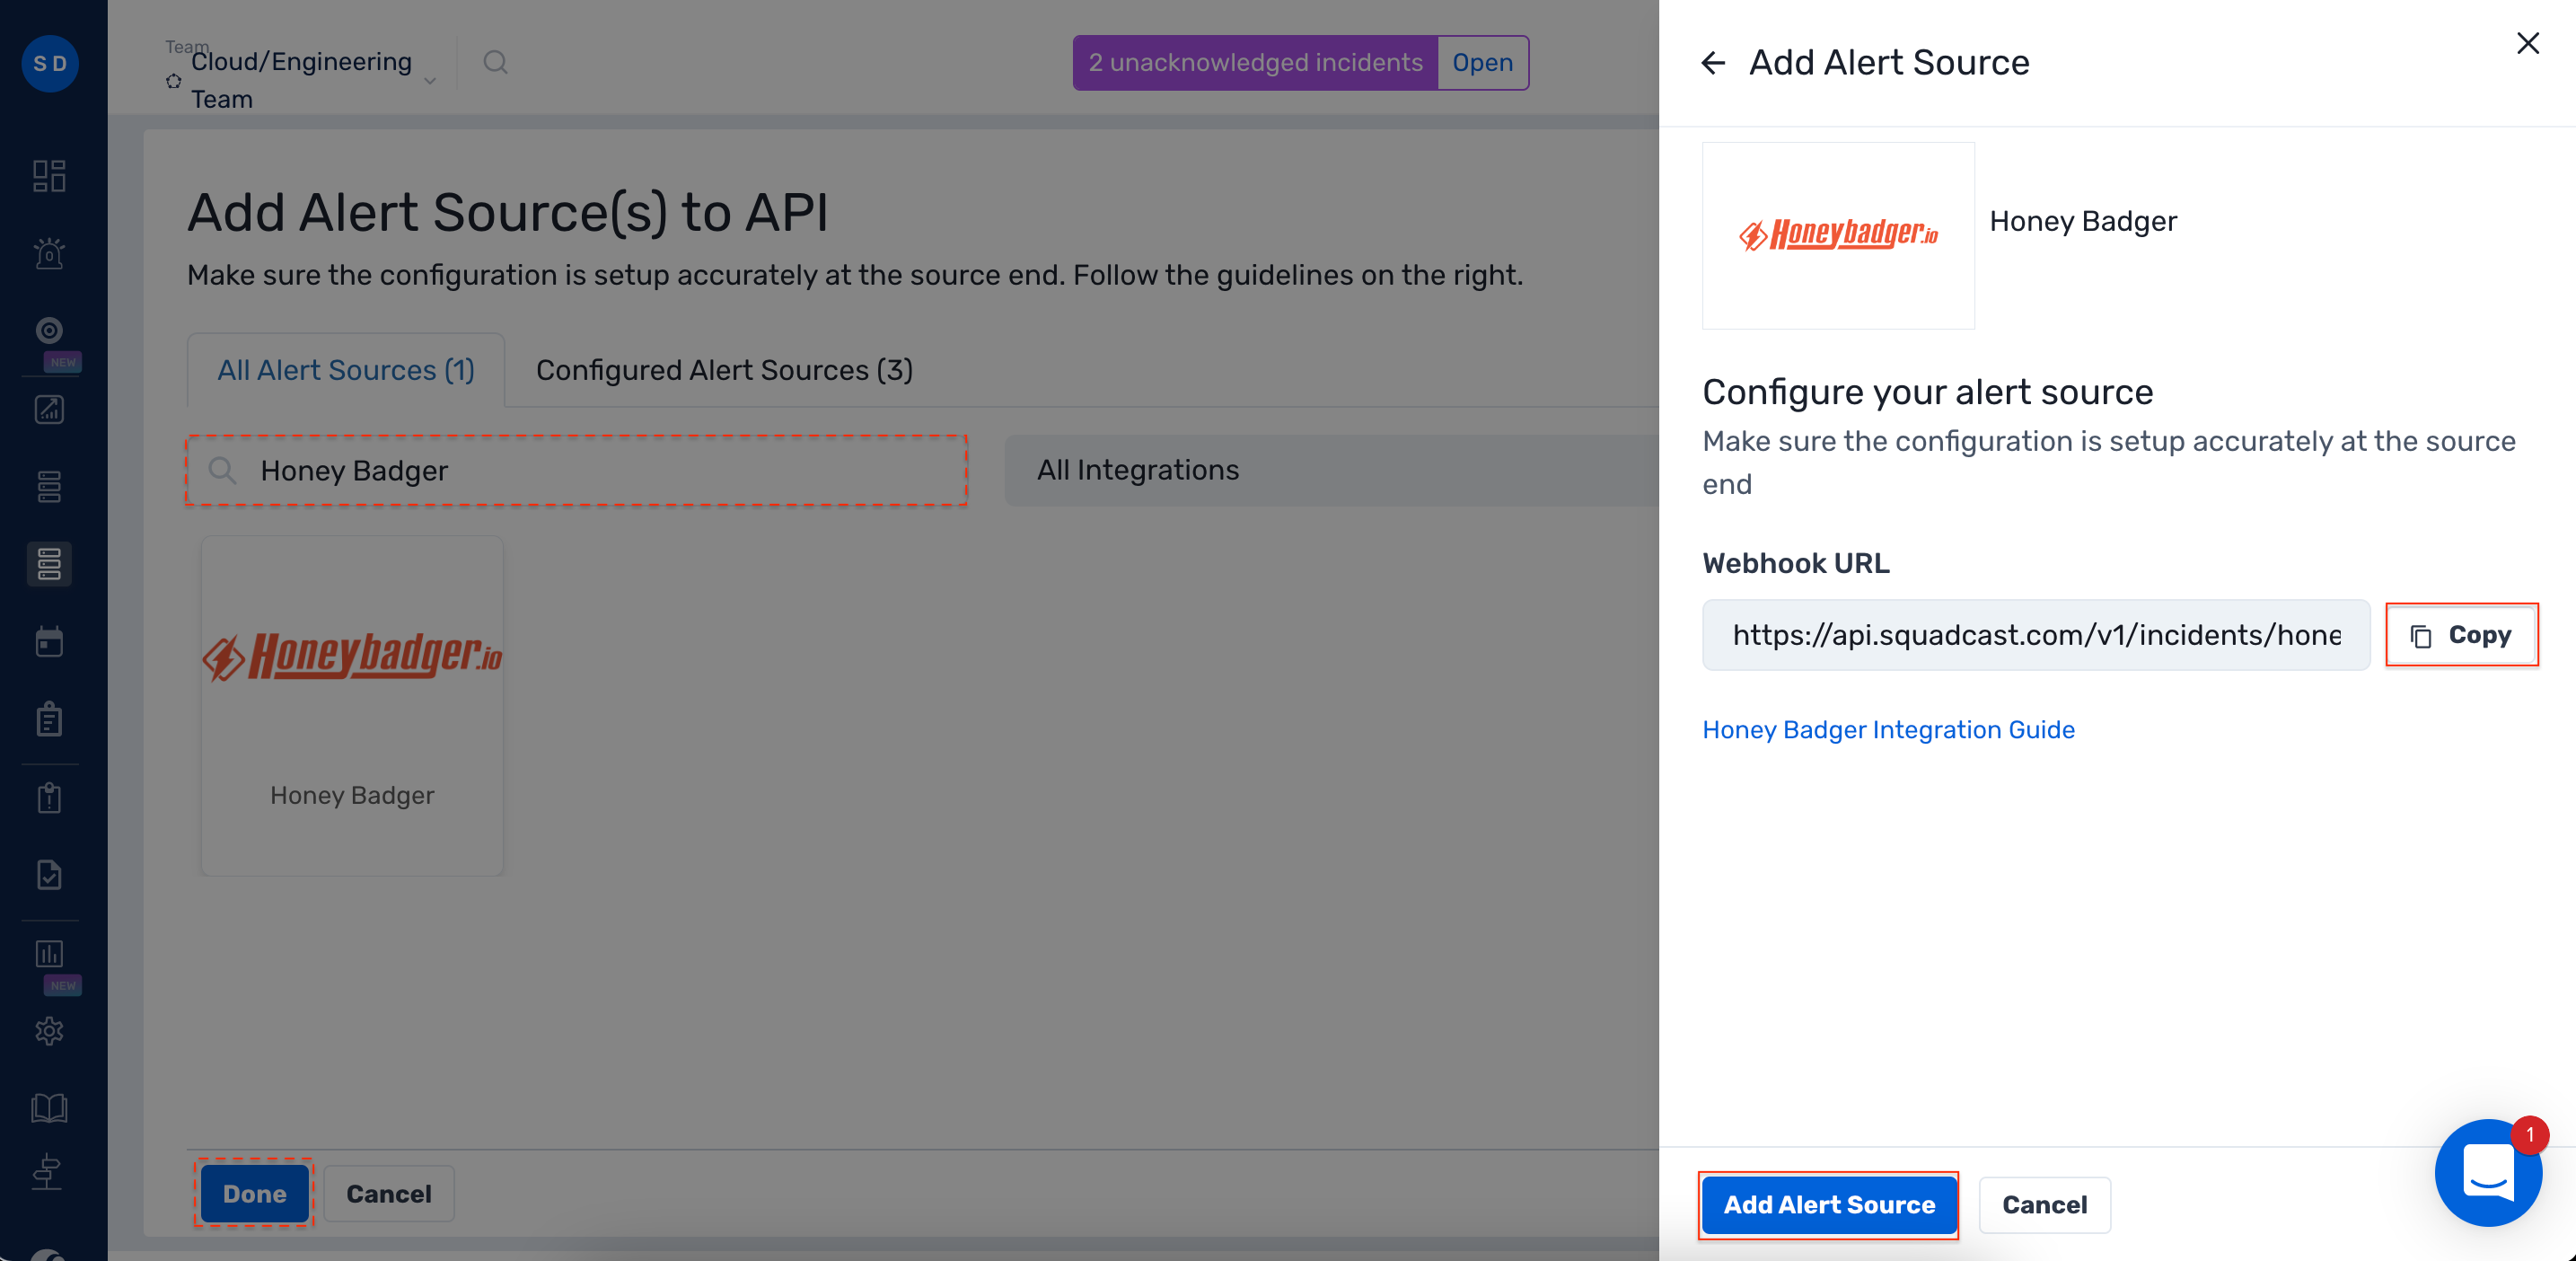
1. Navigate to **Services** -> **Service Overview** -> select or search for your Service. Expand the accordion -> In the Alert Sources section, click **Add**.
2\. Select **Honeybadger**. Copy the displayed **Webhook URL** to [configure](#create-a-squadcast-webhook-in-honeybadger) it within **Honeybadger.** Finish by clicking **Add Alert Source** -> **Done**.
{% hint style="warning" %} **Important****:**
When an alert source turns Active, it’ll show up under Configured Alert Sources. You can either generate a test alert from the integration or wait for a real-time alert to be generated by the Alert Source.\
\
An Alert Source is active if there is a recorded incident via that Alert Source for the Service.
{% endhint %}
### Create a Squadcast Webhook in Honeybadger
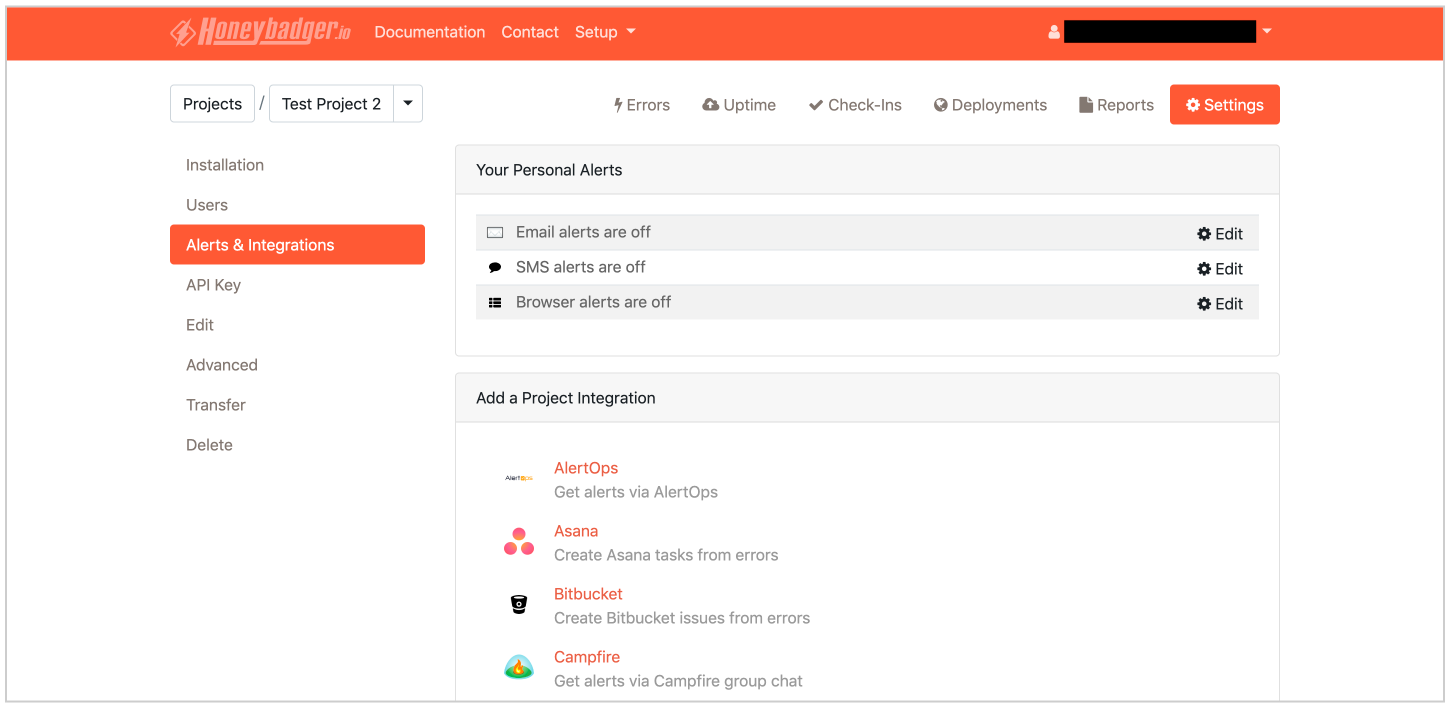
1\. Log in to your **Honeybadger** web console and go to the **Settings** tab of your project.
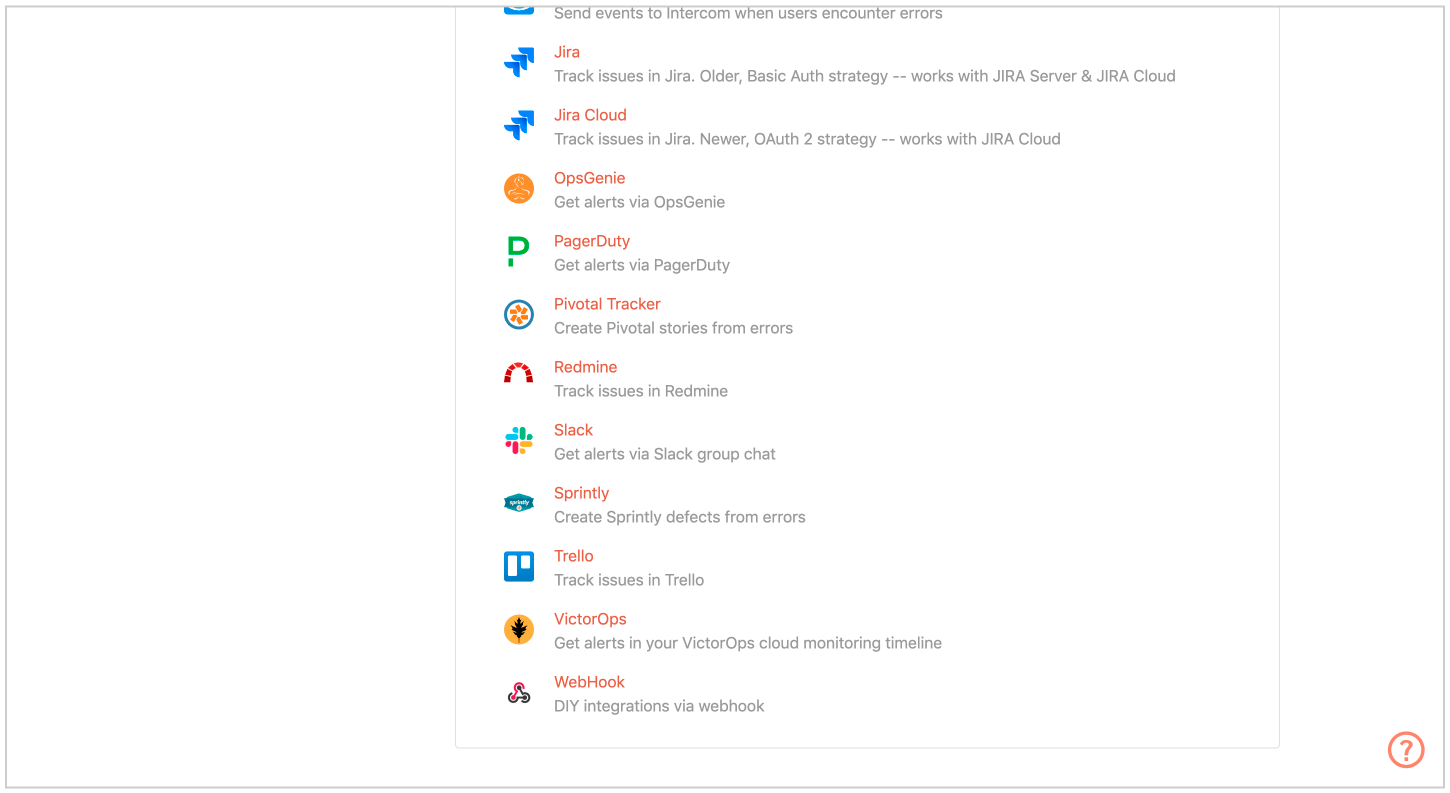
2\. Under **Settings**, click on the **Alerts & Integrations** tab in the sidebar. Under **Add a Project Integration**, select **WebHook**.
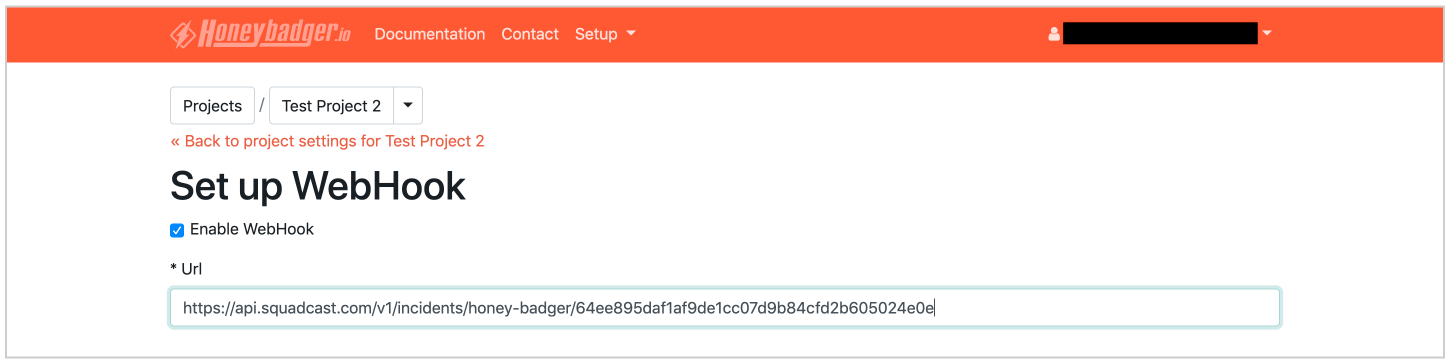
3\. You will now be directed to the **Setup WebHook** page. In the URL input field, paste the Honeybadger Webhook URL that you had initially copied from the Squadcast Dashboard.
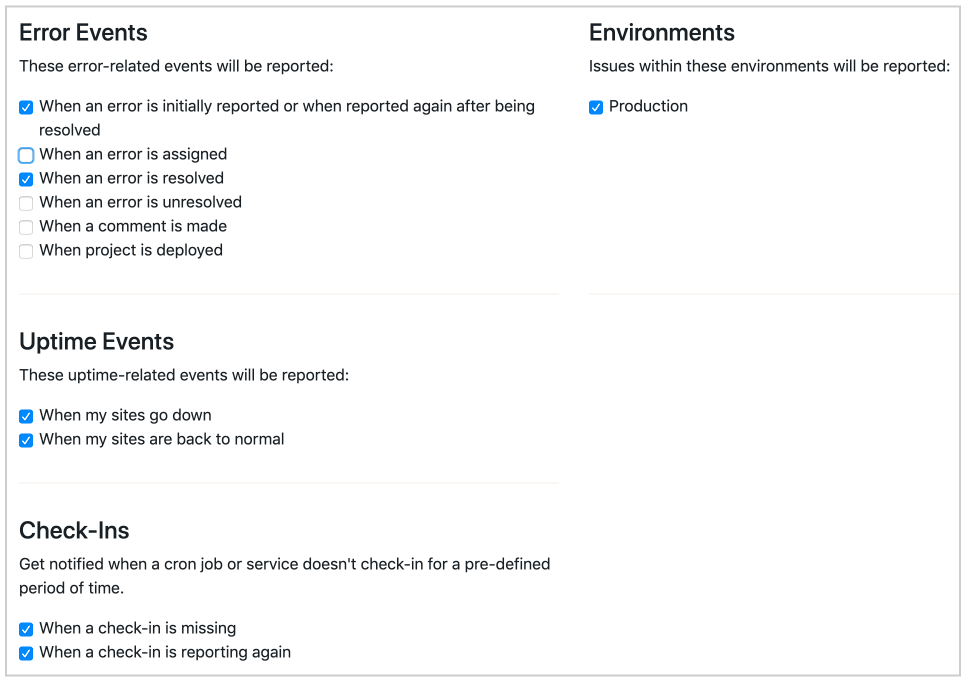
4\. Scroll down to set up the events that you want to trigger an alert for. The following image lists the events that are supported in Squadcast.
5\. Configure the **Rate escalation** and **Notification throttling** sections as per your requirements.\
\
6\. Save these changes.
* Now whenever an event is triggered in Honeybadger, an incident will be created automatically in Squadcast.
* And once the event that triggered the incident(s) is resolved in Honeybadger, the relevant Squadcast incidents created would get resolved automatically.
*Have any questions?* [*Ask the community*](https://community.squadcast.com/view/home)*.*